Hello fellow office workers, ever wanted the perfect mouse for productivity? Turns out it doesn’t exist, especially if you like macro buttons and have your doubts about the MX Master series (which has been going downhill a bit).
Scroll down to head straight to my foam mod for the Razer Naga X.
Why start with gaming mice?
Have a quick search on Google and you’ll soon find out the MX Master 3S is recommended for the true professionals, but it has no shortage of negative reviews. This made me hesitant to buy it, especially given its premium price (really, it’s getting ridiculous).
As someone who likes creating macros to make my job easier, I started to consider gaming mice, particularly those with a lot of buttons (for MMO type games). Let’s face it, gaming mice are great, they typically have all the characteristics you want in a productivity mouse:
- Excellent sensors (to pwn noobs, or accurately drag boxes in PowerPoint, you pick)
- Great ergonomics (after all gaming mice are made to be used hours on end)
- Lots of buttons (for competitive advantage, or macros, you pick again)
- Customization options that save to the on-board memory of the mouse (great for gaming at LAN parties, or to use macros on your restricted work laptop, you pick 😁)
And they have two main downsides for use in a professional environment:
- Too much RGB
- Too clicky (i.e. your coworkers will hate you)
As you can see gaming mice tick lots of boxes that so-called “productivity mice” don’t. They also come out quite a bit cheaper. So, with that realization, I set out to create the perfect productivity mouse based on an MMO gaming mouse.
Selecting a good basis
With all the customization available, the looks of the mouse will stay roughly the same so picking a non-gamer gaming mouse was a priority. Next, I wanted a wired mouse (because I hate carrying around batteries or having to remember to charge it, personal preference really). Last but not least, I wanted an MMO mouse with 16 buttons total.
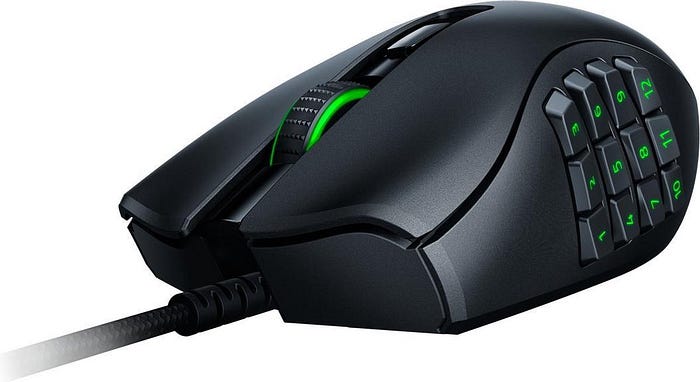
With all these criteria in place the cheapest option was: the Razer Naga X.

Addressing too much RGB
The good thing about the Razer Naga X: the logo on the back is non-rgb this means the scroll wheel and side-buttons can be set to a neutral white at low brightness (or turned off entirely) and it will still look slick and professional.
The hack: addressing the clickiness
I work in an open office, so ideally my custom mouse doesn’t make more noise than the Dell generic office mouse provided by default. The Razer Naga X is horrendously clicky though, the side buttons are fine, but the left and right mouse buttons are LOUD. Really, Reddit complains about it.
So, what do you do when you have a perfect mouse that’s stupidly loud in an office environment? You mod it to be quiet.
Foam modding the switches
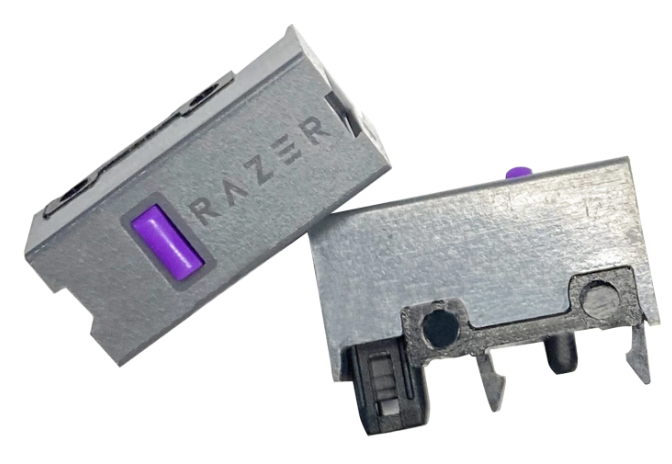
Luckily, I’ve watched plenty of mechanical keyboard videos to get the basic idea of how an optical switch works, and the Naga X uses Razer’s 2nd gen optical switches. One day after receiving the mouse I found myself opening it up.
Getting to the switches:
- Carefully remove the sliding pads from the bottom of the mouse with a flathead screwdriver, if you’re careful enough you can reuse them.
- Undo the four bottom screws and carefully open up the mouse. I found that the sides are separate pieces that tend to come off together with the top. Be extra careful with the ribbon cable that attaches the side buttons. Just move slow in general, you don’t want to break any plastic tabs.
- After opening up the mouse you can look for the switches, these are positioned underneath the primary buttons (left & right click), i.e. next to the scroll wheel (which makes them easy to locate).

Having found the switches, take extra care to remove them from the PCB. To be honest, I just put a flathead screwdriver in their forward side and made sure to not bend the PCB while slowly lifting them up. They popped out easily, but your mileage may vary. If you want to be extra careful you can remove the PCB from the bottom of the mouse to access the plastic tabs holding the switches in place to slowly push them out.
Once you have gotten the switches out you can take those apart by pushing the tabs on the front and back (short sides). You’ll want to separate them with the purple tab facing down (as else it falls out and you have to maneuver it back in).
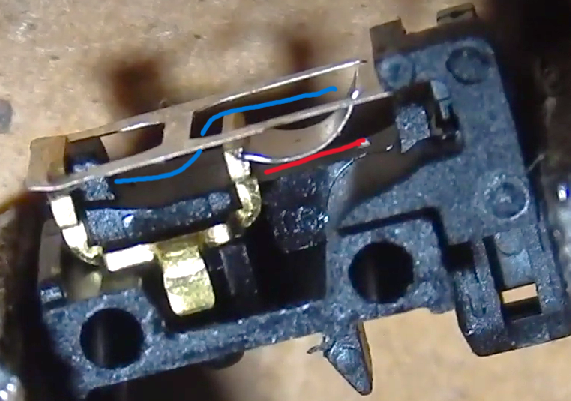
You should now have access to the inside of the switch, which looks like this (source):

Then I applied two tiny pieces of packaging foam (1mm stiff kind, something like this) I had laying around to the following areas:
- Long piece to the top of the clicking mechanism (which is the curved piece of metal, basically a spring), shown in blue
- Small square-ish piece to the bottom of the clicking mechanism, shown in red
Each of these pieces was cut to be roughly 80% of the width of the switch, or about the size of the hole between the two metal pieces.
I found that the long piece works best when pushed through the narrow hole between the two metal pieces and found it easiest to do so using a very small flat head screwdriver. The bottom piece served to dampen the spring on the way down and can be put into position much easier (but doing so with a screwdriver is still recommended).
Putting the switch back together I first tested if I was happy with the noise it was making before repeating the process and putting the mouse back together.
Concluding
With the mouse back together, it now feels mushier but is quieter than the Dell default office mouse. I suspect this process will be the same for all Razer mice with optical v2 switches, meaning the same can also be done with the wireless models. It may also be generalized to all optical switches.
In the end, a simple foam mod gave me exactly what I wanted: a quiet ergonomic mouse with many buttons for all my macro needs.